DIY Christmas Stocking from Thrifted Shirts
on Dec 06, 2018, Updated Jul 14, 2021
This post may contain affiliate links. Please read our disclosure policy.
Want to add your own unique touch to holiday decorations? Check out this easy and budget-friendly DIY Christmas Stocking idea made with thrifted shirts!
Just in time for Christmas! Jerry and I have never had matching Christmas stockings. It’s just one of those things we always forgot about until Christmas. And then we would immediately forget again for another year.
This year, with my holiday antennae on high alert because it’s Oscar’s first Christmas, I decided we needed family stockings! I started to look around in a few stores but they aren’t cheap. At least the ones I like aren’t :-). So I decided to go with this DIY Christmas Stocking idea and I love how they turned out.
DIY Christmas Stocking Supplies
I scoured the internet for patterns and ideas and decided it looked simple enough. I had a lone stocking from years past that I used to trace the pattern and decided to add some embellishments. You will need a few supplies to get started.
- Sewing machine
- Thread
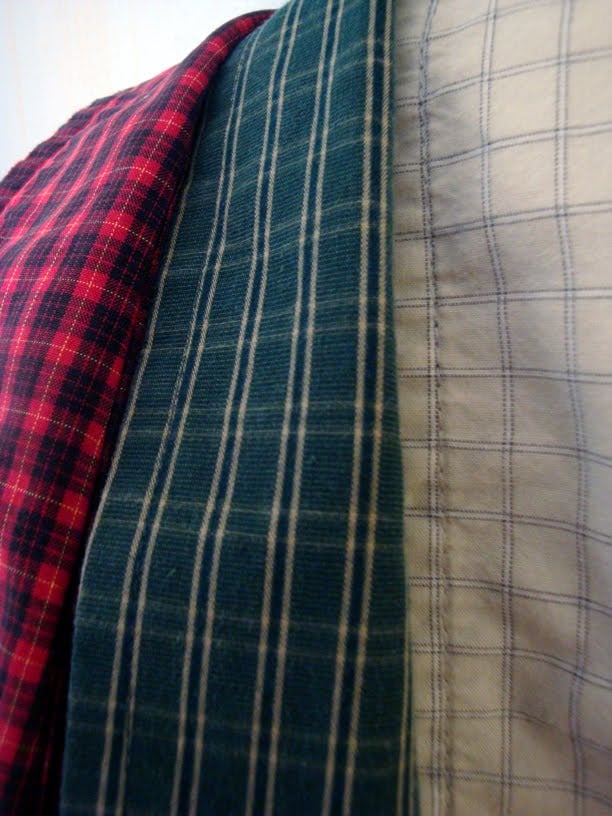
- 3 or 4 plaid shirts (I found mine at a thrift store)
- Poster or cardboard for your pattern template
- Pen
- Scissors
- Fusible bonding web
It was VERY simple! So easy that you still have time to whip some up for yourself. Read on for the how to.
DIY Christmas Stocking Tutorial
Step 1 – Go Thrifting
I decided to use men’s cotton shirts to make our stockings. They don’t stretch but I am still a bit of a beginner and stretchy fabric is harder to sew (at least for me).
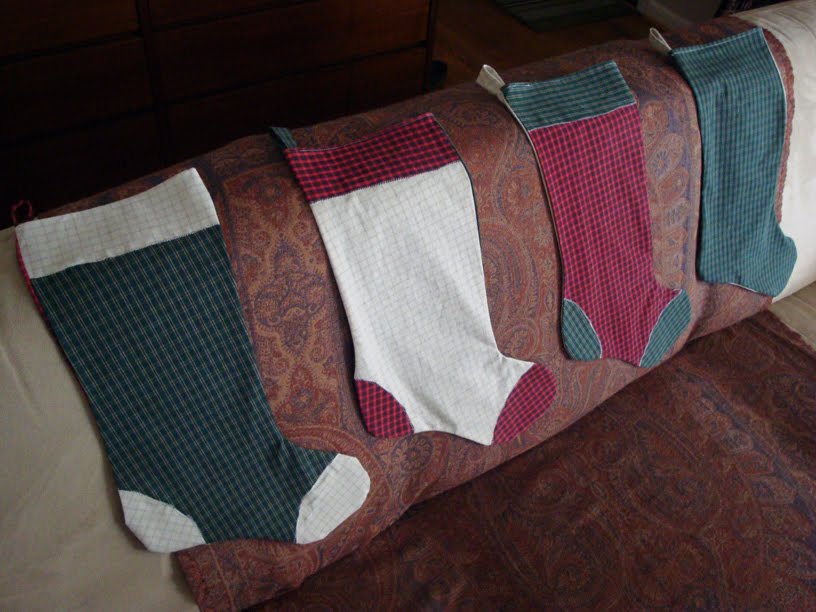
I found 3 plaid shirts for a total of $8. This was more than enough for our 3 family stockings plus one for for our dog, Krusty!
Step 2 – Make a Pattern
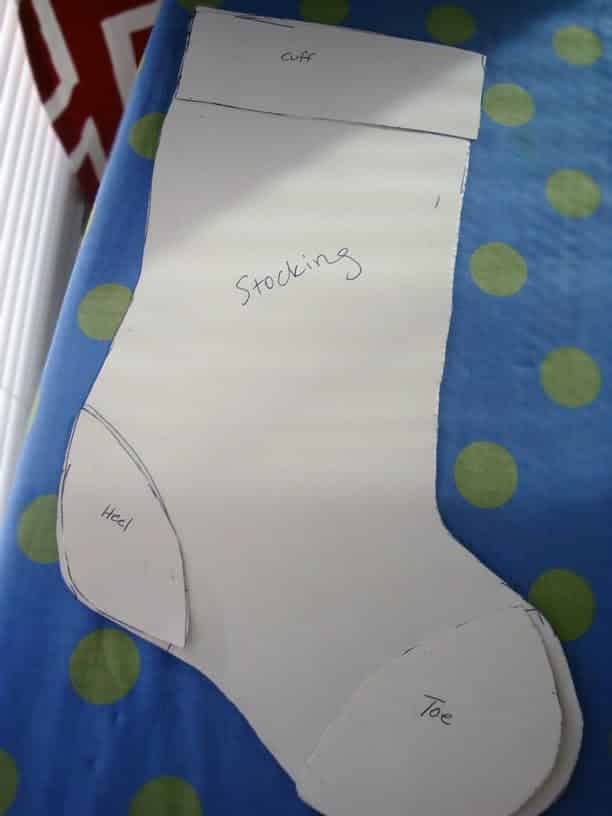
Like I said, I just traced an old stocking for the pattern, but really, you could probably freehand this. I also drew the cuff and patches and then cut them all out of poster board. I like using poster board instead of paper because it’s easier to trace.
Step 3 – Cut your fabric
I decided to make 3 stockings using different contrasting colors. Get creative. This is the part where you make it your own! Don’t forget to cut the mirror image of the stocking for the back – you want the right sides to match up hehe.
Step 4 – Attach patches/cuff
Would you like to save this?
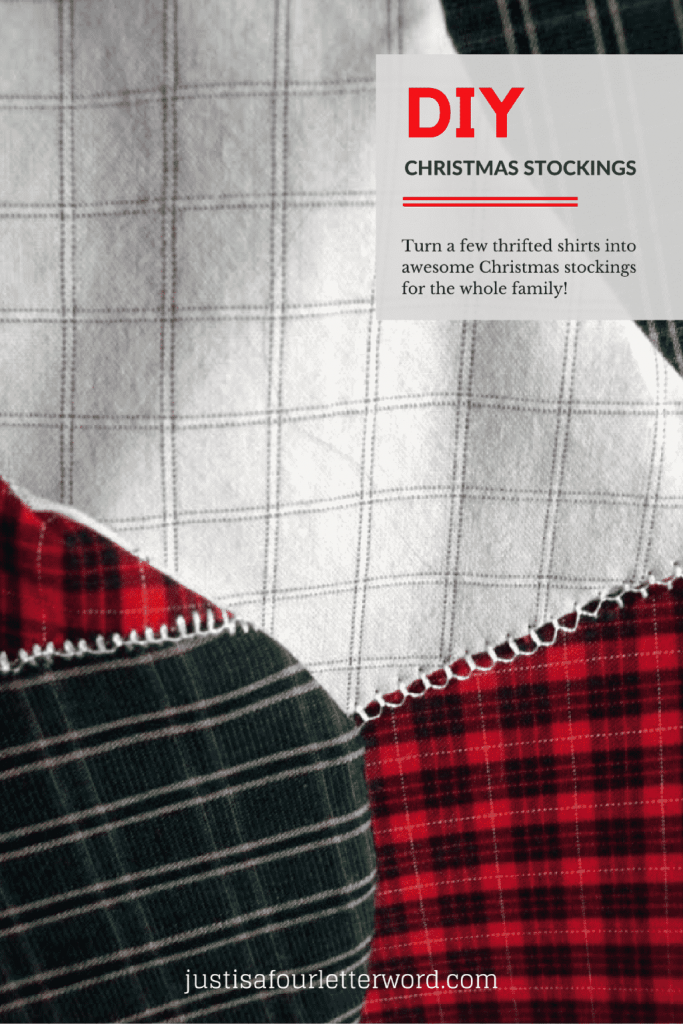
On the front side of the stocking, I used fusible bonding web to iron on the patches and cuff. I didn’t use a lot, just enough to make it stick. The point of this is to keep the patches in place for sewing.
Are you seeing a theme here? i’m ALL about the ease in just about anything but especially for a diy Christmas stocking that we’ll only use a couple weeks a year.
Step 5 – Sew Patches
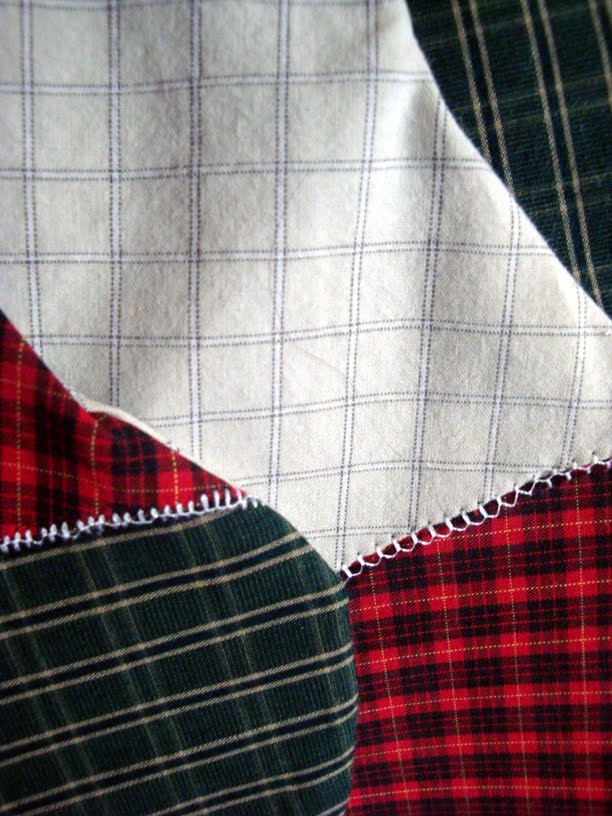
I used a zig-zag stitch directly over the part where the 2 pieces come together. This hides the unfinished edge and gives a fun little decorative touch. Contrasting thread is really fun here!
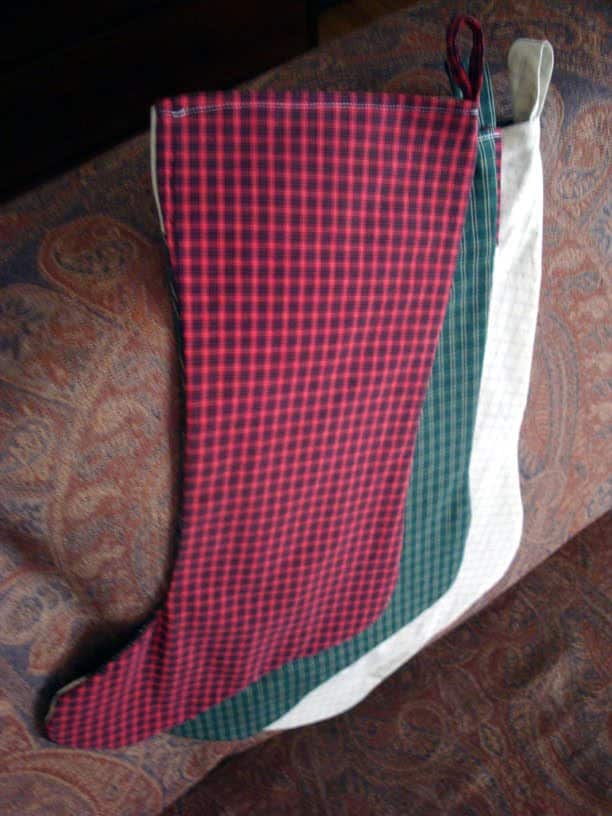
Step 6 – Join Front/back
Again I used a contrasting color for the backs of the stockings. You want to lay the two pieces flat – right sides together – and stitch along the edge ( I gave about a 1/4 inch seam allowance). leave the top open. Before you turn it right side out, fold the unfinished edges of the top over and sew along the inside, attach ribbon loop to heel side of opening.
Step 7 – Turn right side out and Press
All done – Tada!
I still plan to add our names to each stocking but that is going to take some more cutting and stitching. I haven’t decided exactly how I want to do it yet either. Anyway, this was so much fun and SO easy. I promise. I made all 4 stockings in under 3 hours.
I love Christmas traditions and we have several like our family stuffing recipe that I look forward to each year and taking Christmas card photos. I’m so excited to add our own handmade stockings to the list. It truly is the most wonderful time of the year!
Originally published December 2009. We still use these every year!
Like it? Share it!


Love these!! I made stocking for my older three but then baby girl came and she doesn’t have one yet. Might have have to grab a few shirts and sew up new ones for everyone!
Very Cool! those look great.
Love, love, love it!! Did I mentioned that I LOVE IT!! Great work, Andrea. I love handmade things. My mom taught me to sew when I was pretty young, but I have yet to get a sewing machine of my own. Hoping to do that this coming year. 🙂
Very cute!
These are the CUTEST things ever! I so wish I had at least one creative bone in my body!
Very cute! I love the plaid shirts.
I made ours last year because my son's name was too long for any monogramming. Plus I got to make them really oversized for extra good stuffing goodness!